Poles and Zeros of z-Transforms

5:46
Properties of the Region of Convergence (c)
14:44
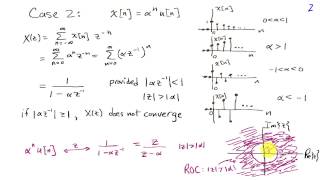
Region of Convergence for the z-Transform

6:30
Intro to Control - 7.1 Poles and Zeros
15:08
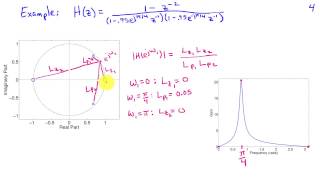
Frequency Response Magnitude and Poles and Zeros

13:07
Z Transform Region of Convergence Explained ("the best explanation in the internet!")
13:50
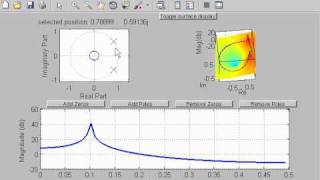
Z-Domain - Pole Zero Plots Relationship with System Frequency Response

16:25
Understanding the Z-Plane

8:57