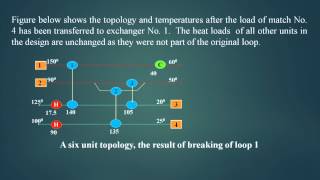
Heat Integration Part 5/5: Determining the Best Arrangement of Heat Exchangers

5:09
Heat Integration Part 1/5: Introduction and Selecting a Minimum Approach Temperature

21:35
Heat Integration Intro with Example
5:51
Heat Integration Part 3/5: Constructing a Temperature Interval Diagram
40:13
Mod-05 Lec-07 HEN optimization

7:57
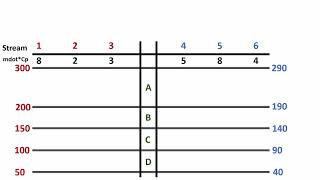
Heat Integration Part 4/5: Constructing a Cascade Diagram

5:25
Heat Integration Part 2/5: Stream Identification
9:52
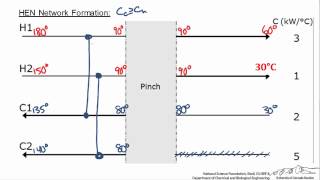
Designing a Heat Exchanger Network

59:34