Basic slide rule theory and use (Part 3): Square and Cube scales A, B, & K
13:36
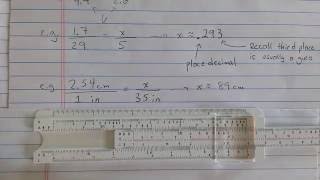
Basic slide rule theory and use (Part 4): Proportions -- A,B,C,D Revisited

18:20
Basic slide rule theory and use (Part 1): C and D scales

6:24
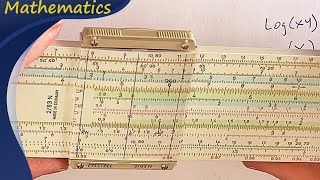
Slide Rule CF/DF and CI scales

18:06
Basic slide rule theory and use (Part 5): Chaining and S/T/L scales

15:51
Using a slide rule to solve a 19th century exam
4:05
Introduction to the Slide Rule

19:40
Post Versalog vs. K+E Deci-Lon: slide rule showdown

9:14